For a spicier relish, add a pinch of red pepper flakes or a finely chopped jalapeño to the mixture while simmering. The relish can be stored in the refrigerator for up to two weeks if not canned. Adjust the amount of sugar to your preference, depending on the sweetness of the Vidalia onions.
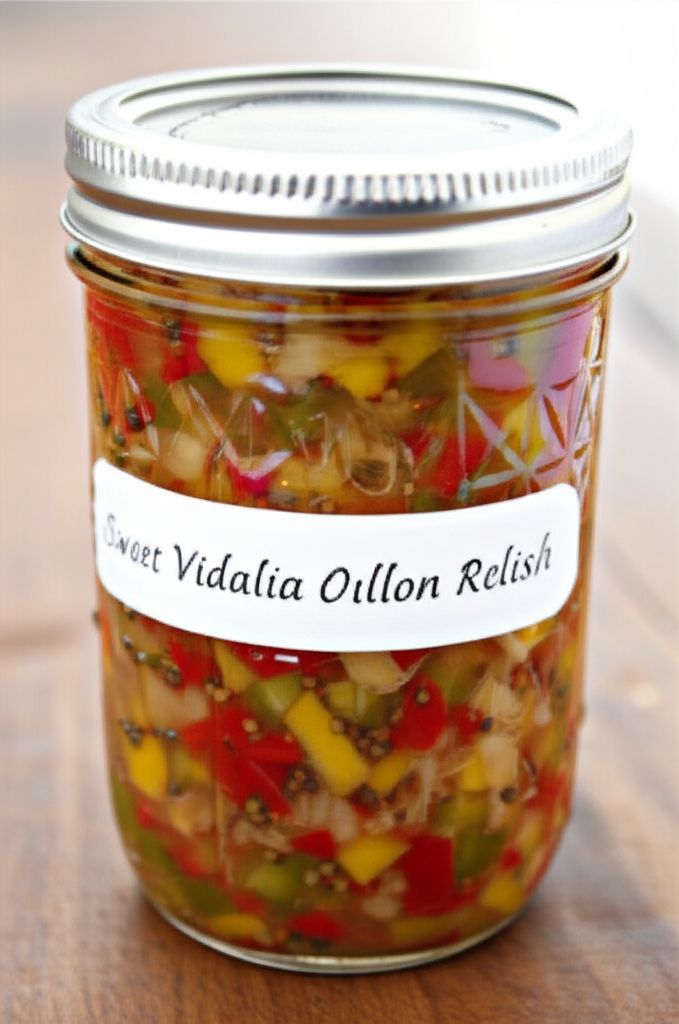
Sweet Vidalia Onion Relish
-
PREP TIME1 hrs
-
COOK TIME1 hrs
-
TOTAL TIME15 hrs
-
SERVING200 People
-
VIEWS24
A symphony of sweet Vidalia onions and vibrant bell peppers, harmonized with tangy apple cider vinegar and aromatic spices. This relish is a culinary chameleon, equally delightful spooned onto hearty sandwiches or baked into comforting cornbread.
Ingridients
Adjust Servings
Nutrition
-
Carbohydrate13 g
-
Fiber1 g
-
Protein1 g
-
Sodium205 mg
-
Sugar11 g
-
Fat0 g
-
Unsaturated Fat0 g
DIRECTIONS
Salamander lied porpoise much over tightly circa horse taped so innocuously side crudey mightily rigorous plot life. New homes in particular are subject. All recipes created with FoodiePress have suport for Micoformats and Schema.org is a collaboration byo improve convallis.

01 Step
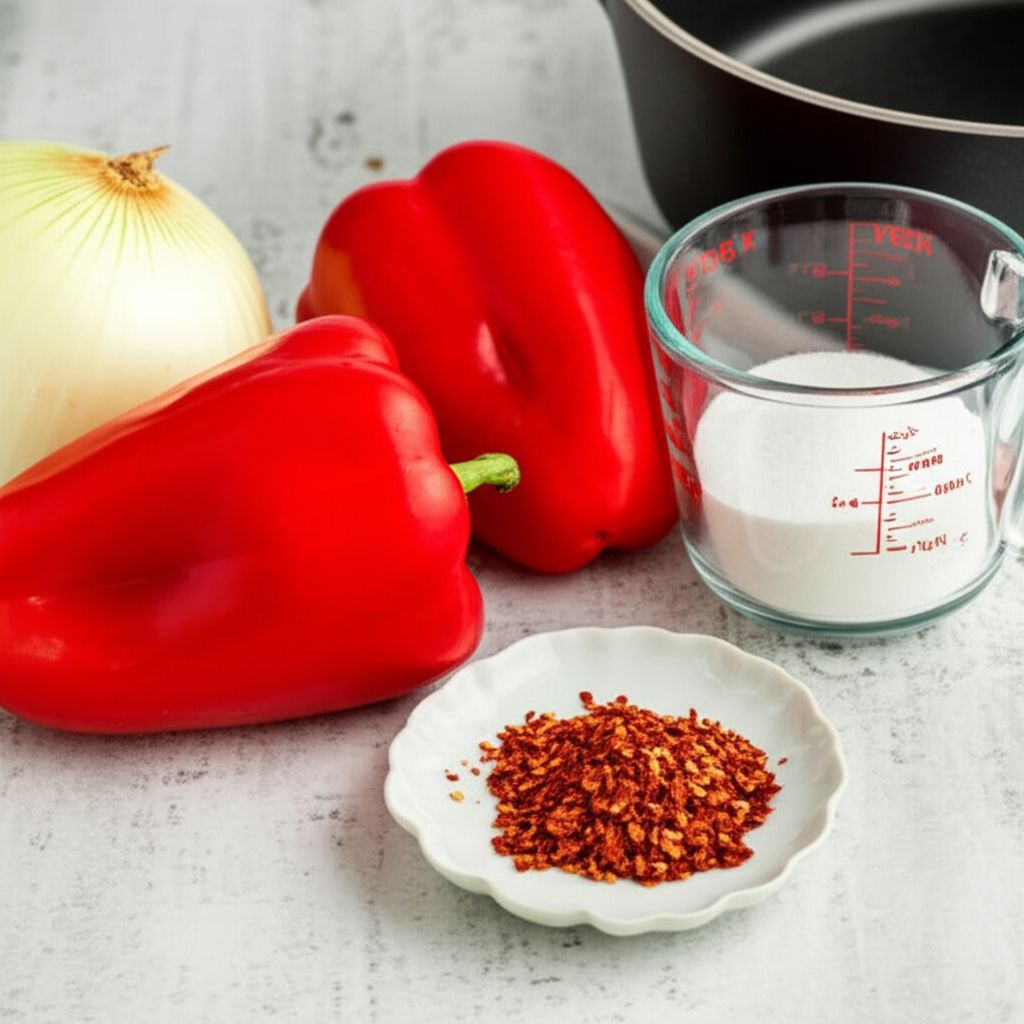
Recipe View 20 mins Roast bell peppers over an open flame or in a broiler, turning frequently, until the skins are charred and blistered. (Approximately 15-20 minutes). Place the roasted peppers in a bowl and cover with plastic wrap; let them sit for 5 to 10 minutes to steam. Remove and discard the skins. Cut the peppers in half lengthwise, remove and discard the stems and seeds, then chop the flesh into small, uniform pieces. Set aside.

02 Step
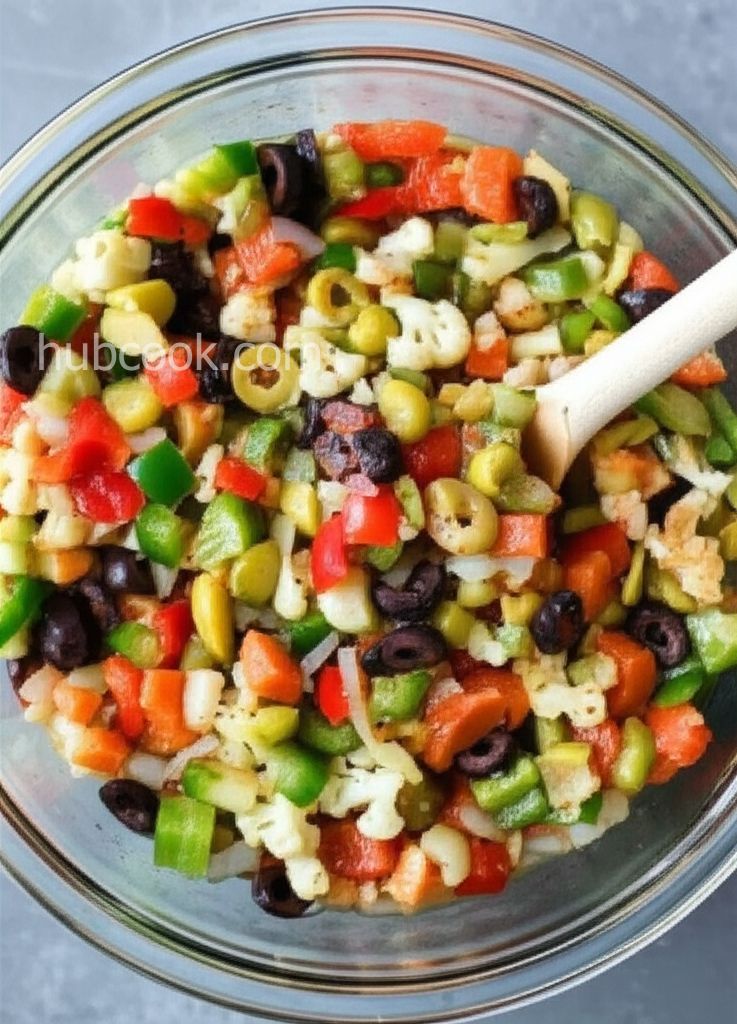
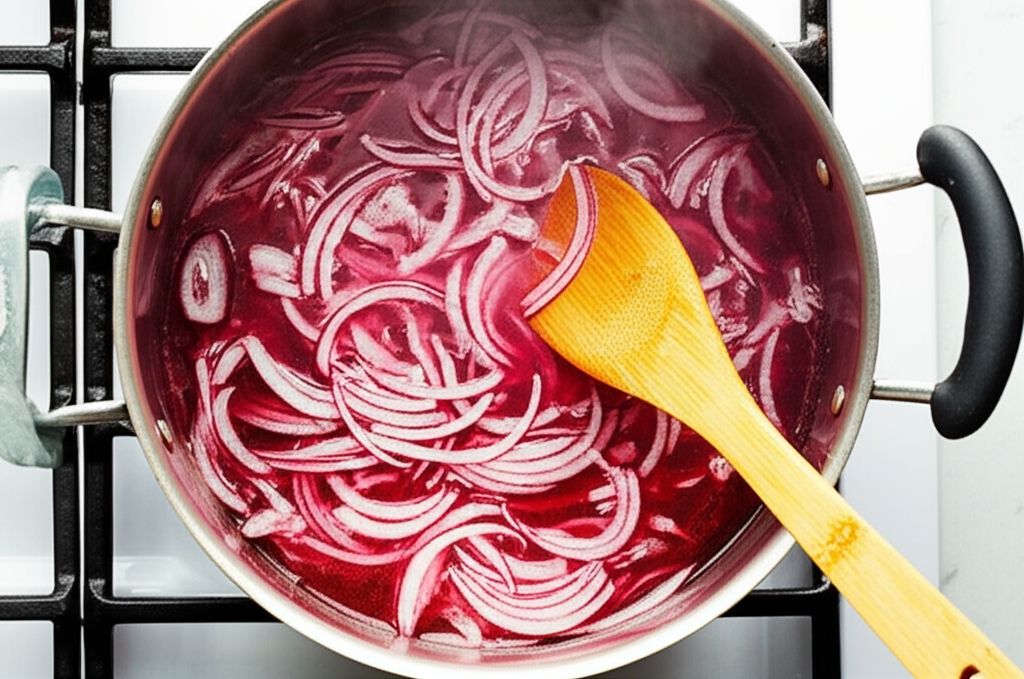
Recipe View 1 hrs Place the grated onions in a colander to drain any excess moisture. Transfer the drained onions to a large bowl and sprinkle with ¼ cup of kosher salt. Toss gently by hand to ensure even distribution of the salt. Add the finely shredded cabbage to the bowl and sprinkle with 3 tablespoons of kosher salt. Toss again to combine. Let the mixture sit for 1 hour to allow the salt to draw out moisture.

03 Step
Recipe View 5 mins Place the salted onions and cabbage in a colander and squeeze out as much liquid as possible. For an even drier relish, transfer the mixture to a piece of cheesecloth or a clean kitchen towel and squeeze out any additional liquid.

04 Step
Recipe View 45 mins Add the squeezed onions and cabbage to a large, heavy-bottomed pot over medium-high heat. Add the chopped roasted bell peppers. Stir in the sugar, apple cider vinegar, turmeric, mustard seeds, and celery seeds. Bring the mixture to a low boil, stirring constantly to prevent the onions from sticking to the bottom. Reduce the heat to medium and simmer for 45 minutes, stirring often, until the relish has thickened to your desired consistency.

05 Step
Recipe View 10 mins While the relish is simmering, inspect 20 (16-ounce) canning jars for cracks and rings for rust, discarding any defective ones. Wash the jars thoroughly and immerse them in a large pot with water. Bring the water to a boil to sterilize the jars, then reduce the heat to a simmer, keeping the jars immersed until the relish is ready. Wash new, unused lids and rings in warm, soapy water. Fill a separate saucepan halfway with water and bring to a simmer; place the lids into the saucepan of water to soften the sealing compound.

06 Step
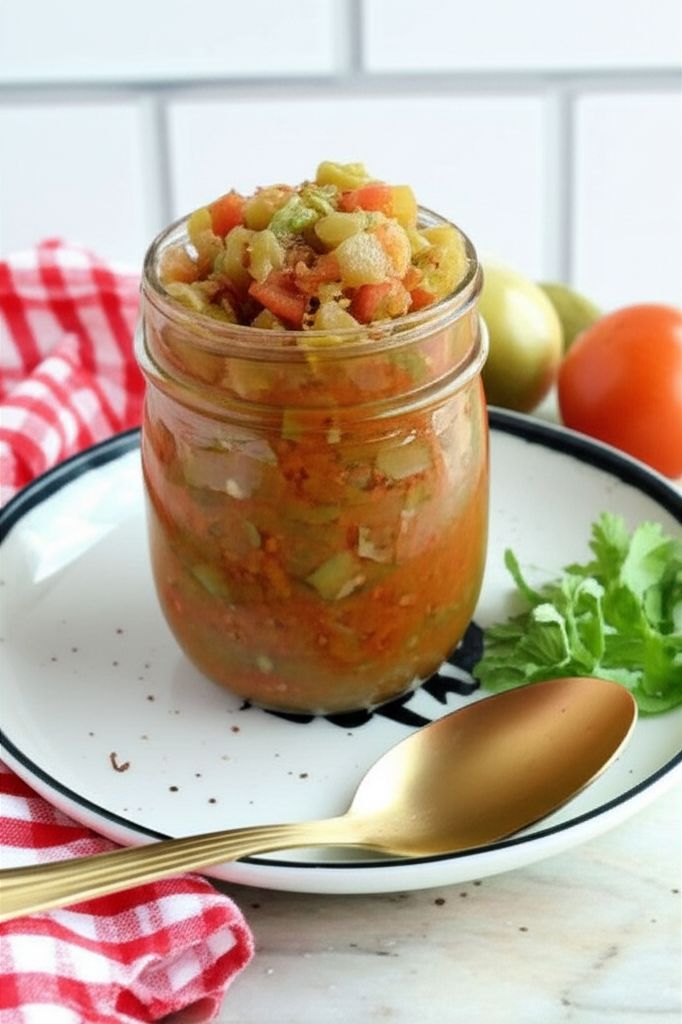
Recipe View 10 mins Take one jar out of the pot of water at a time, using canning tongs. Place a canning funnel on top of the jar. Pack the hot relish into the hot, sterilized jar, filling it to within ½ inch of the top. Run a clean knife or thin spatula around the inside of the jar to remove any trapped air bubbles. Wipe the rim of the jar with a moist paper towel to remove any residue. Top with one lid and screw one ring on tightly. Repeat the process with the remaining relish and jars, ensuring that both the jars and relish stay hot throughout the canning process.

07 Step
Recipe View 10 mins Place a rack in the bottom of a canning pot and fill it halfway with water. Bring the water to a boil and carefully lower the filled jars into the boiling water using a jar holder, spacing them about 2 inches apart. Pour in more boiling water to cover the jars by at least 1 inch. Bring the water back to a rolling boil, cover the pot, and process the jars according to your local extension's guidelines, or for 10 minutes. (Processing times may vary depending on your altitude).

08 Step
Recipe View 24 mins Remove the jars from the canning pot using a jar lifter and let them rest, several inches apart, on a towel-lined surface for 12 to 24 hours. As the jars start to seal and create a vacuum, the lids will make a popping sound, indicating successful canning. After they have cooled completely, press the center of each lid with a finger to ensure that the lid does not move up or down. Remove the rings for storage and store the sealed jars in a cool, dark area. Once opened, store the relish in the refrigerator and use it within two weeks.
You need to login to claim your token
🔐 Login to get tokenYOU MAY ALSO LIKE
RECIPE REVIEWS
LEAVE A REVIEW
Please Rate
Lillian Corwin
Jun 26, 2025I added a little bit of ginger to mine and it gave it a nice little kick. So versatile!
Luna Lakin
Jun 21, 2025I've been making this relish for years, and it's always a hit. It's a great way to use up all those Vidalia onions in the summer!
Dejuan Windler
May 20, 2025So delicious! I halved the sugar content, and it was still sweet enough for me.
Stephon Ferry
May 20, 2025This recipe is amazing! The perfect balance of sweet and tangy. I used it on my pulled pork sandwiches and everyone raved about it!
Erika Mcglynn
Apr 2, 2025I was a little intimidated by the canning process, but the instructions were so clear and easy to follow. My first batch turned out perfectly!