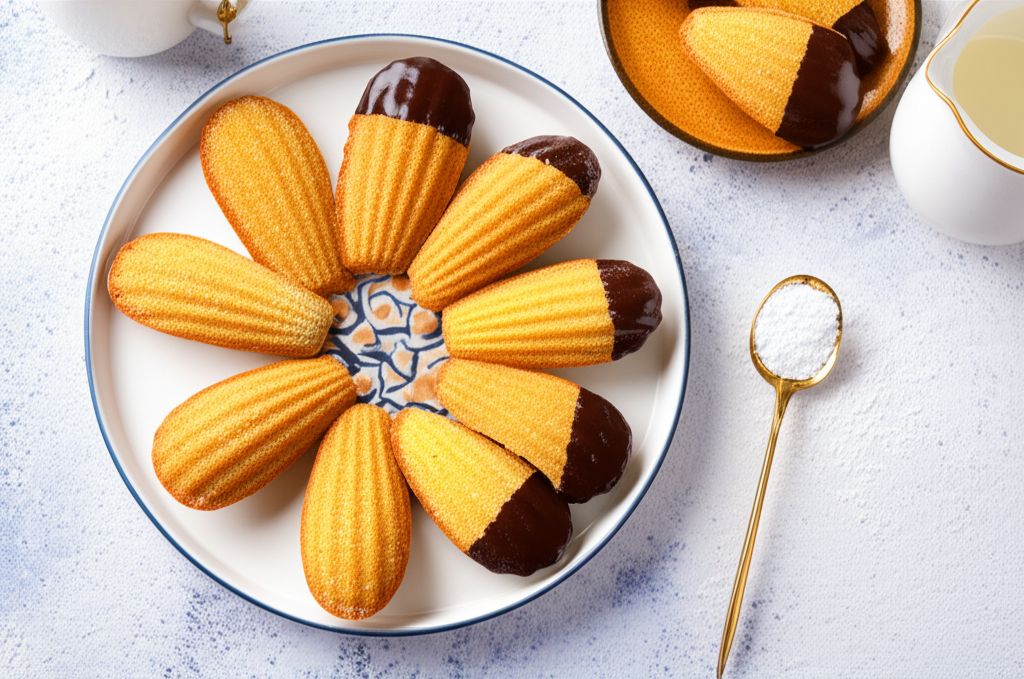
For chocolate tuiles, whisk 2 tablespoons of unsweetened cocoa powder with the cake flour before adding it to the batter. The batter can be stored in the refrigerator for up to 2 days. Allow it to soften slightly at room temperature before using. If the tuiles become too hard to shape before you're finished, return them to the oven for a minute or two to soften them again. Experiment with different extracts, such as almond or lemon, to customize the flavor. Sprinkle the tuiles with chopped nuts, seeds, or sanding sugar before baking for added texture and visual appeal.
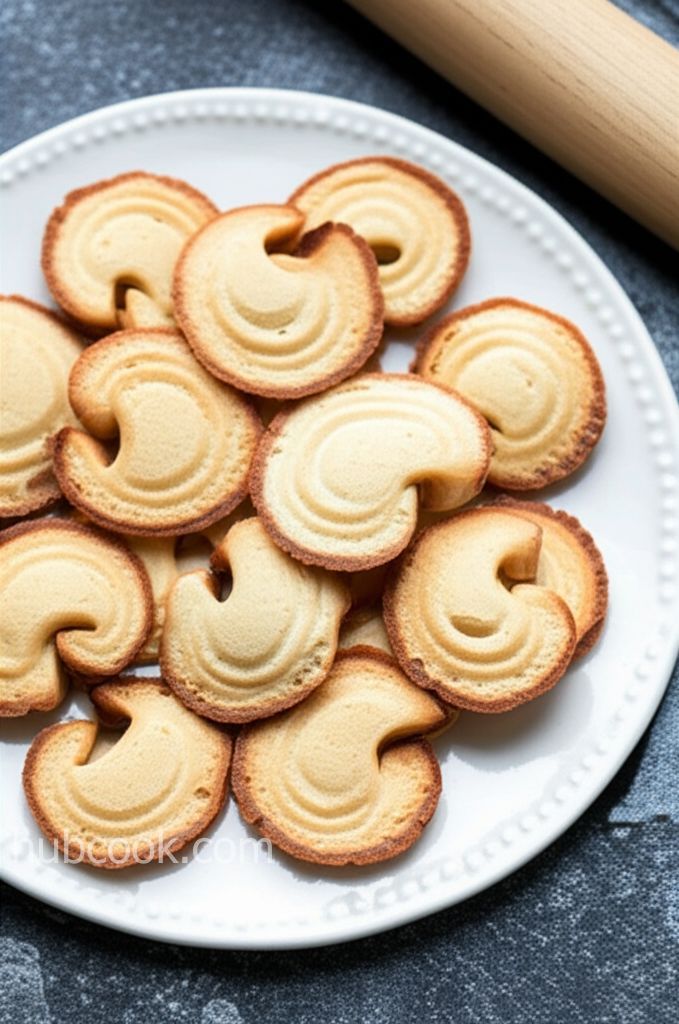
Vanilla or Chocolate Tuiles
-
PREP TIME45 mins
-
COOK TIME10 mins
-
TOTAL TIME2 hrs 5 mins
-
SERVING12 People
-
VIEWS12
Delicate and crisp, these elegant tuiles, named after the French word for 'tile,' offer a delightful buttery flavor and a satisfying snap. Mold them into classic curves or get creative with their pliable warmth straight from the oven.
Ingridients
Adjust Servings
Nutrition
-
Carbohydrate19 g
-
Cholesterol20 mg
-
Fiber0 g
-
Protein2 g
-
Saturated Fat5 g
-
Sodium20 mg
-
Sugar10 g
-
Fat8 g
-
Unsaturated Fat0 g
Follow The Directions
01
Step
5 mins
In a mixing bowl, cream together the butter and confectioners' sugar using an electric mixer on medium-high speed until light and fluffy. (Approximately 3-5 minutes)
02
Step
3 mins
Gradually beat in the egg whites, one at a time, ensuring each is fully incorporated before adding the next. Stir in the vanilla extract. (Approximately 2-3 minutes)
03
Step
2 mins
Reduce the mixer speed to low and gently add the cake flour. Mix until just combined, being careful not to overmix the batter. Overmixing can result in tough tuiles. (Approximately 1-2 minutes)
04
Step
1 hrs
Cover the bowl with plastic wrap and chill the batter in the refrigerator for at least 1 hour, or up to overnight. This chilling period allows the gluten to relax and prevents the tuiles from spreading too thinly during baking. (Approximately 60 minutes)
05
Step
0 mins
Preheat your oven to 325 degrees F (165 degrees C). Line a baking sheet with parchment paper or a silicone baking mat.
06
Step
0 mins
Create a stencil: Cut a circle (about 3 1/2 inches in diameter) in a piece of cardboard or plastic to use as a template. Place the stencil on the prepared baking sheet.
07
Step
0 mins
Spread the batter: Using a small offset spatula, place a spoonful of chilled batter in the center of the stencil. Spread the batter evenly and thinly within the stencil's boundaries. Carefully lift the stencil off, leaving a perfectly shaped circle of batter. Repeat with the remaining batter, leaving some space between each tuile.
08
Step
9 mins
Bake the tuiles in the preheated oven until the edges are lightly golden brown, about 8 to 10 minutes. Keep a close eye on them, as they can burn quickly.
09
Step
6 mins
Shape the tuiles: Remove the baking sheet from the oven. Working quickly while the tuiles are still warm and pliable, use a thin spatula to lift each tuile from the baking sheet. Drape them over a rolling pin, the edge of a glass, or any other curved surface to create the classic tuile shape. Alternatively, you can flatten them with a spatula to create a flat wafer. (Approximately 5-7 minutes)
10
Step
0 mins
Allow the tuiles to cool and harden completely on the curved surface. Once cooled, they will become crisp and retain their shape. Store the cooled tuiles in an airtight container at room temperature to maintain their crispness.
You need to login to claim your token
🔐 Login to get tokenYOU MAY ALSO LIKE

RECIPE REVIEWS
LEAVE A REVIEW
Please Rate

Nicolas Herman
Jun 29, 2025These tuiles were so easy to make and looked so impressive! I shaped them into cones and filled them with ice cream for a fancy dessert.
Emmitt Stark
Jun 27, 2025Be careful not to overbake them! They burn easily. But when they're perfectly golden brown, they're amazing.
Ellie Hansen
Jun 14, 2025My first batch spread out too much, but chilling the batter longer helped a lot. The second batch was perfect!
Dee Lynch
Jun 8, 2025I added a pinch of sea salt to the batter, which really enhanced the buttery flavor. Delicious!
Mitchell Schamberger
Jun 6, 2025This recipe is a keeper! I love how versatile it is. I've made them with both vanilla and chocolate, and they're always a hit.