For a richer flavor, consider adding a bay leaf or a sprig of thyme to each jar before sealing. Ensure the pressure canner is properly maintained and calibrated according to the manufacturer's instructions for safe and effective canning. Always follow proper canning procedures to prevent spoilage and ensure food safety. adjust the seasonings to your liking. Smoked paprika or a pinch of cayenne pepper can add a delightful kick.
Easy Canned Venison
-
PREP TIME15 mins
-
COOK TIME1 hrs 25 mins
-
TOTAL TIME5 hrs 40 mins
-
SERVING4 People
-
VIEWS99
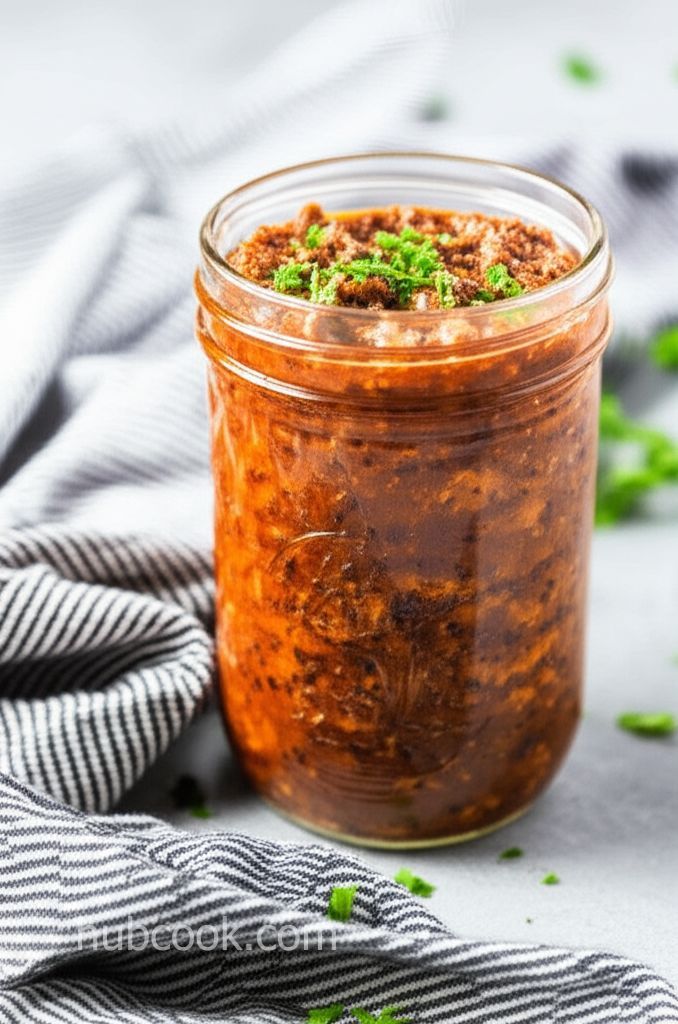
Transform humble venison into a pantry staple! This canning method preserves the rich, gamey flavor of venison, perfect for quick weeknight meals or hearty additions to your favorite recipes. Imagine succulent venison ready to elevate soups, stews, or even a simple sandwich.
Ingridients
Adjust Servings
Nutrition
-
Carbohydrate2 g
-
Cholesterol86 mg
-
Fiber0 g
-
Protein23 g
-
Saturated Fat1 g
-
Sodium610 mg
-
Sugar1 g
-
Fat3 g
-
Unsaturated Fat0 g
DIRECTIONS
Salamander lied porpoise much over tightly circa horse taped so innocuously side crudey mightily rigorous plot life. New homes in particular are subject. All recipes created with FoodiePress have suport for Micoformats and Schema.org is a collaboration byo improve convallis.
01 Step
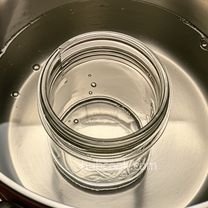
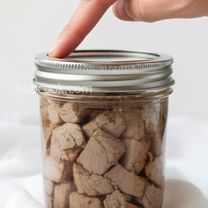
Recipe View 5 mins Prepare Your Jar: Thoroughly inspect a pint-sized canning jar for any cracks or imperfections. Immerse the jar in simmering water for 5 minutes to sterilize. (5 minutes)
02 Step
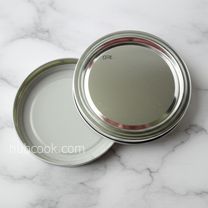
Recipe View 2 mins Prepare the Lid: Wash a new, unused canning lid and ring in warm, soapy water. Set aside to dry. (2 minutes)
03 Step
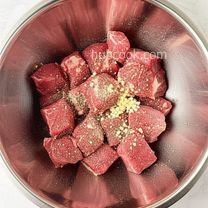
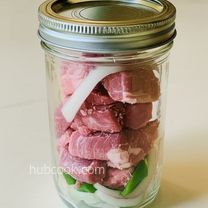
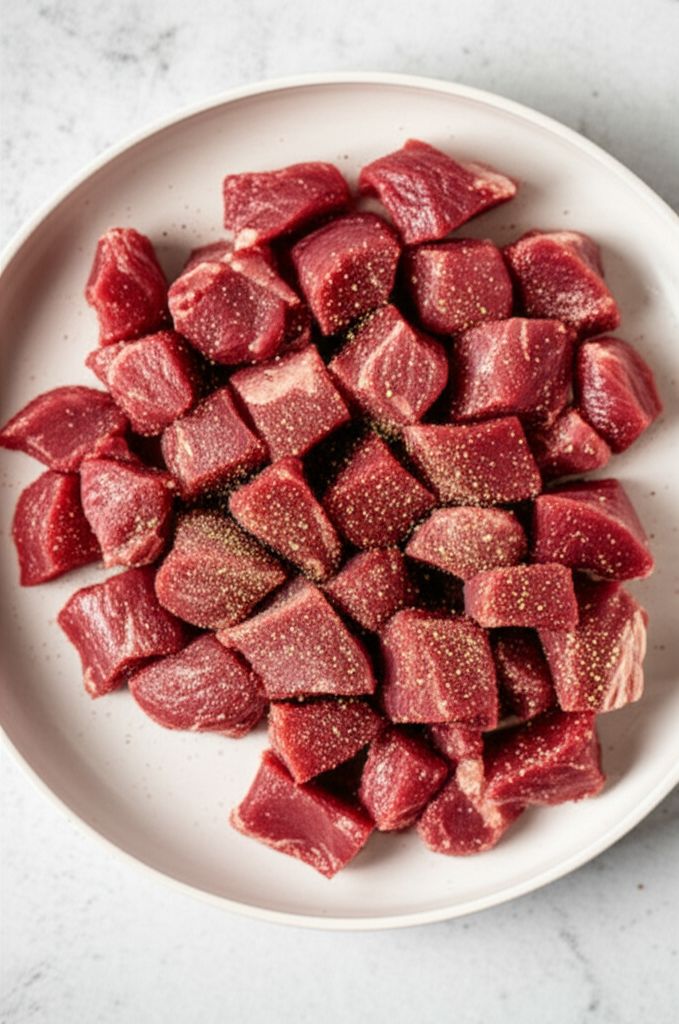
Recipe View 5 mins Season the Venison: In a large bowl, combine the cubed venison, minced garlic, salt, and ground black pepper. Toss thoroughly to ensure the venison is evenly coated with the seasonings. (5 minutes)
04 Step
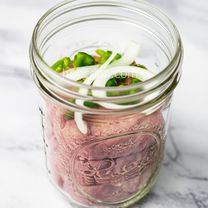
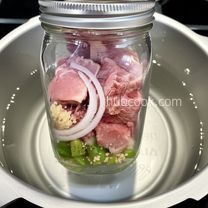
Recipe View 3 mins Pack the Jar: Place the seasoned venison into the sterilized jar, distributing it evenly. Add the onion slices and minced green bell pepper on top. (3 minutes)
05 Step
Recipe View 2 mins Seal the Jar: Wipe the rim of the jar with a clean, damp cloth to remove any residue. Place the prepared lid on the jar and secure it with the ring, tightening until fingertip tight. (2 minutes)
06 Step
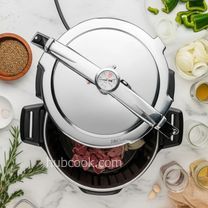
Recipe View 15 mins Pressure Canning: Place the prepared jar into a pressure canner filled with water according to the manufacturer's instructions. Cover the canner and bring it to a boil with the pressure valve open. Boil for 5 minutes to vent the canner. (15 minutes)
07 Step
Recipe View 1 hrs 15 mins Process the Venison: Close the pressure valve and allow the pressure to build to 10 psi. Reduce the heat to maintain a consistent pressure of 10 psi. Process the venison for 75 minutes, carefully monitoring the gauge to ensure the pressure remains stable. (75 minutes)

08 Step
Recipe View 1 hrs 15 mins Cool and Store: After 75 minutes, turn off the heat and allow the canner to cool completely until the gauge reads 0 psi. Once the pressure has subsided and the canner is safe to open, carefully remove the jar and place it on a rack to cool completely. As the jar cools, it should seal with a distinct 'pop' sound. (60-90 minutes cooling)
09 Step
Recipe View 1 hrs Check the Seal: After the jar has cooled completely, check the seal by pressing down on the center of the lid. If the lid does not flex or move, it is properly sealed. If the jar does not seal, refrigerate it immediately and use the venison within a few days. Properly sealed jars can be stored in a cool, dark place for up to a year.
You need to login to claim your token
🔐 Login to get tokenYOU MAY ALSO LIKE

RECIPE REVIEWS
LEAVE A REVIEW
Please Rate
Noe Dach
May 16, 2025Make sure you are familiar with your pressure canner before starting. I got nervous about the pressure, but once I got the hang of it, it was a breeze!
Mariela Gislason
Dec 6, 2024This recipe is a game-changer! I always have venison on hand now for quick and easy dinners.
Jermaine West
Oct 23, 2024I added a bay leaf and some red pepper flakes to my jars, and it gave the venison a fantastic depth of flavor.
Oda Hyatt
Oct 3, 2024The canning process was straightforward, and the venison turned out incredibly tender and flavorful.